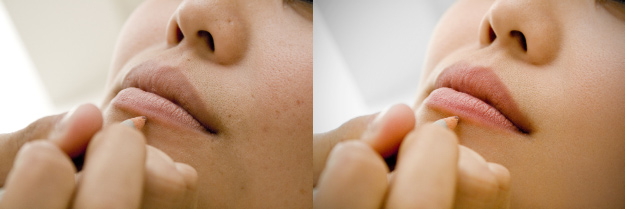
Once you’ve completed Retouching in Photoshop Page 1, you may have started to notice the next problem to tackle. We’ve softened and removed the main blemishes, but the skin tone is still blotchy and uneven. In this next step we’ll solve this problem using the dodge and burn tools.
Look at our image below (you will need flash player installed to view it) and roll your mouse cursor over the image. Highlighted in green are areas that are a little too dark, and highlighted in red are areas that are too light. Roll your cursor over a few times, allowing your eyes time to adjust to each image. Remember that too dark or light is hugely subjective, and the example given is one artist’s very rough 60-second appraisal of the skin tone variations at a macro level. It’s just a guide, but it should be enough to train your eye towards these variations. There are others I’ve missed out, and no doubt a few errors, so don’t follow it exact. It’s ultimately up to you how you interpret your image. [Read more…] about Retouching In Photoshop 1 – The Basics Page 2
