Now we have a more even skin tone cleared of major blemishes, we might look to adjustments and masks to complete our image. It strikes me that the lips need to draw the eye more, so we’re going to work on drawing the viewers attention to our intended point of focus.
Selections, masks and adjustments
I’m going to start with a couple of global adjustments, here are the first few changes I made;
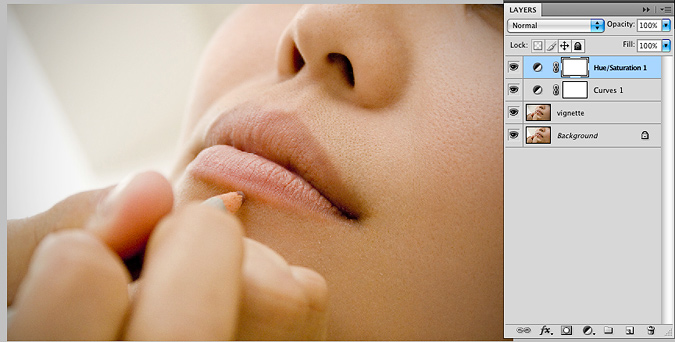
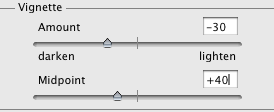
I started with a vignette (darkened the periphery of the image slightly to draw the eye toward to centre) by choosing Filter> Distort> Lens Correction. Experiment with the Vignette sliders yourself (for added control, first choose Filter> Convert for Smart Filters then set the filter as before. The vignette will now be clipped to the layer in your layers palette and editable at any time.)
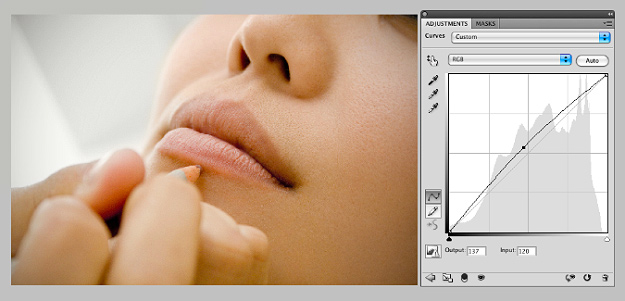
Using the Curves adjustment layer I brightened the whole image a touch by pulling the RGB curve up slightly and increased saturation by 20 points with the Hue/Saturation layer. Again, these settings always vary greatly based on the image you’re working with, so view magazines and the portfolios of high end retouchers you admire for inspiration.
Local Adjustments
In future retouching tutorials I’ll focus on numerous ways to perfect and enhance lips, but in this beginner tutorial we’re going to make a simple local adjustment with a layer mask to bring more focus to the lips in this image.
First make a neat selection with the lasso tool (L) and click Refine Edge in the options bar. Set the Feather slider to a nice soft transition so we lose the hard edge.
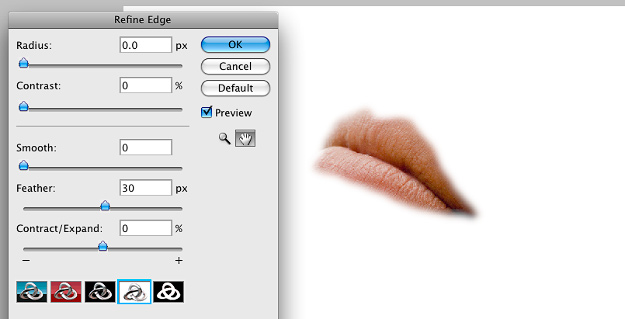
Choose a Curves adjustment layer from the Adjustment Layers palette and you’ll notice that altering the curves only affects the selected area. Here I darkened the selection slightly by pulling down the main RGB curve. Use the dropdown menu ringed in red below to choose the independent Red, Green and Blue Curves and bring up the red and lower the green (increases magenta) slightly.
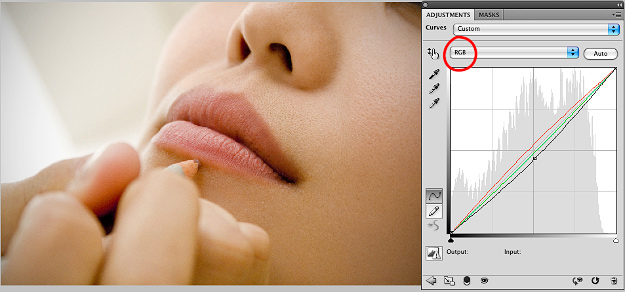
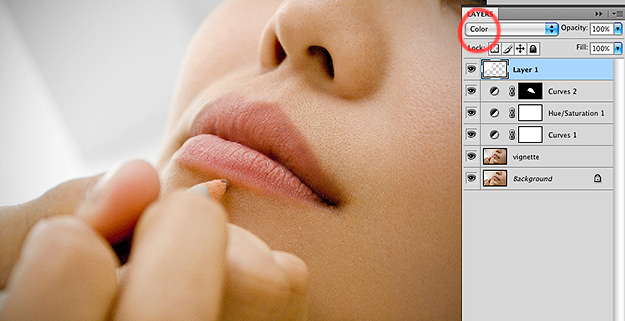
You’ll notice that in the layers palette, the usual white mask beside the Curves layer icon is now black, and the lips selection remains white; ![]()
By clicking on the mask you can always alter the selection by painting with white, black or grey tones to hide or reveal more of the effect. Black hides the adjustment, white shows through, and all grey shades inbetween are gradated.
To finish the image I felt removing the yellow colour cast in the background would bring out the foreground subject nicely. For this image a quick and simple way to do this is the start a new layer, set the blend mode to Color and simply paint with white over the area.
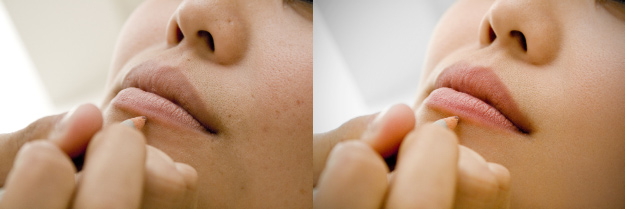
Here is our final image, side by side with the original;
Please look out for further tutorials in which I’ll demonstrate in greater detail how to non-destructively dodge and burn, sharpening methods, and more in depth localised adjustments such as hair, eyes and lips.
I have a question about skin tones when re touching. What is the best way to determine you have consistent skin tones?
One of the issues I have will files direct from camera is flat gray skin tones. When I color correct I tend to lean towards warmer tones, but I still find my results are very inconsistent. Most of my portraits are under natural light.
Any suggestions on things I can try?
Thanks,
Great post Daniel, phenomenal insight! Look forward to more posts, ill pass the word around!
Thanks, I can´t wait for more tutorials from you. This really helpt me alot
Thank you so much indeed for all the info & the explanations!!
your tutorial is one of the best I read, please keep on posting more whenever you can.
Really great and there are much to learn about retouching. I’m new in photoshop and it inspired me much.
Great tutorial. I have been using photoshop for a number of years and this is a great tutorial! Very in depth and user friendly.